In today’s era of environmental consciousness, frugality isn’t just about saving pennies; it’s also about making sustainable choices.
One simple yet powerful way to achieve both these objectives is by repurposing jars.
Before you toss out that empty pasta sauce or pickle jar, consider the numerous ways it can be reused to not only save money but also reduce waste.
Here’s a guide to reusing jars for those who have frugality at heart.
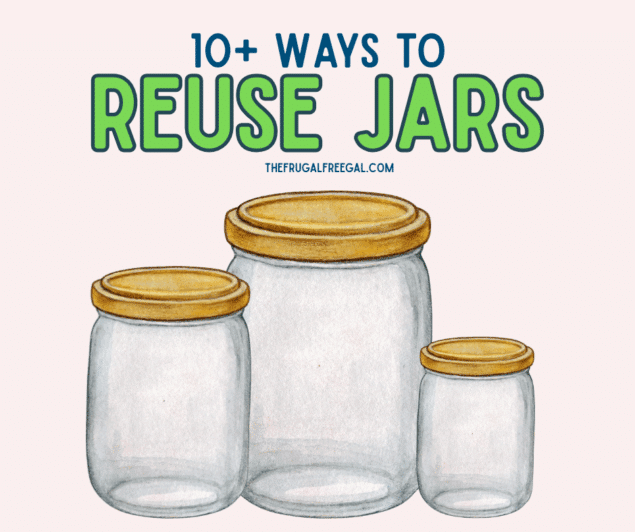
10+ Ways to Reuse Jars
Storage Solutions
Pantry Organizers:
The pantry is often the heart of a kitchen, housing everything from grains to snacks.
But without proper organization, it can quickly become a chaotic space. This is where jars step in as brilliant and frugal organizers.
By using jars of various sizes, you can systematically store items like pasta, rice, beans, nuts, and even baking ingredients.
The transparent nature of jars allows for easy identification, eliminating the need to rummage through piles or opaque containers.
Additionally, a well-organized jar pantry can help in inventory management; at a glance, you’ll know what’s running low and what’s in abundance.
Adorn your jars with stylish labels, and you transform your pantry from a mere storage space to an aesthetically pleasing and functional area, perfectly aligned with the principles of frugal living.
Leftover Containers:
In our continuous quest to reduce waste and maximize resources, saving and consuming leftovers is a practical approach. Jars offer an ideal solution for storing these remaining portions.
Their airtight seal ensures food remains fresh, locking in flavors and preventing any unwanted fridge odors from seeping in.
Their transparent nature lets you quickly identify the contents, making it easier to plan meals around what you already have.
Plus, using jars as leftover containers can reduce your dependence on plastic Tupperware, aligning with a more eco-friendly and health-conscious lifestyle.
The next time you have some extra spaghetti sauce or a portion of last night’s casserole, let a repurposed jar keep it tasty and ready for your next meal.
Spice Holders:
Spices are the heartbeat of any kitchen, adding flavor and flair to your dishes. Storing them efficiently, however, can sometimes be a challenge. Repurposed jars come to the rescue!
These transparent containers are perfect for holding everything from turmeric to thyme.
The clear glass allows you to easily identify each spice, while the airtight seal ensures they retain their freshness and potency.
Labeled jars bring added convenience, helping you locate your desired spice swiftly.
Plus, arranging them on open shelves or inside cabinets offers a clean, uniform look, turning your spice collection into a display of culinary art.
With jars, your spices are not just ingredients; they become part of your kitchen decor.
Candy Jars:
Whether you’re a fan of colorful gummies, vintage hard candies, or decadent chocolates, storing them in clear jars can turn your sweet treats into delightful displays.
Not only do jars keep your candies fresh and free from outside contaminants, but they also offer a decorative edge.
Arrange multiple jars on a shelf or countertop to create a mini candy store vibe in your own home.
This approach is not only visually appealing but also functional, making it easier to access your favorite candies.
For households with kids or frequent guests, labeled candy jars can be a hit, adding a touch of whimsy and nostalgia to your living space.
DIY Projects
Candle Holders:
There’s something truly mesmerizing about the soft flicker of a candle flame. Enhance this beauty by repurposing jars into unique candle holders.
Whether it’s tealights, votives, or pillar candles, jars provide a safe and stylish enclosure. Their transparency allows the candlelight to radiate in all directions, casting a warm and inviting glow.
For added flair, fill the bottom of the jar with decorative items like sand, pebbles, or even coffee beans. This not only anchors the candle in place but also adds a decorative touch.
Using jars as candle holders can be particularly enchanting during outdoor events, dinners, or simply for a relaxing evening at home.
It’s an economical way to create a cozy atmosphere while giving old jars a glowing new purpose.
Picture Frames:
Memories are treasures, and what better way to showcase them than in a unique, repurposed jar? Turn your jars into inventive picture frames for a whimsical touch to your decor.
For this, choose photos, preferably smaller ones, and roll them slightly to fit inside. Position the photo so it’s facing outward, and you’ve got a 360-degree viewable frame.
You can fill the bottom with decorative items like sand, colored stones, or even dried flowers to anchor the picture and add depth.
These jar picture frames can sit on shelves, desks, or mantelpieces, offering a fresh perspective on cherished memories.
Perfect for gifting or just to add a personal touch to your space, jars can immortalize moments in a distinct and frugal manner.
Sewing Kit:
Every household, at some point, requires a trusty sewing kit for those unexpected rips, missing buttons, or creative craft projects.
Transform your jars into compact, organized sewing kits. The jar’s clarity allows for easy visualization of its contents, ensuring you can quickly locate that elusive needle or the right color thread.
You can store spools, needles, buttons, thimbles, and even small scissors in a medium to large jar.
For added ingenuity, cushion the jar lid with a small piece of fabric stuffed with a bit of cotton – voilà, you have an integrated pincushion!
This repurposed jar sewing kit not only ensures all your sewing necessities are in one place but also offers a touch of vintage charm to your crafting area.
It’s a frugal and stylish solution for seamstresses and occasional menders alike.
Craft supplies:
Every craft enthusiast knows the struggle of keeping varied supplies organized. Jars offer an elegant and practical solution to this common dilemma.
Their transparent bodies allow for quick identification and access, making the creative process smoother and more enjoyable.
Store everything from buttons to beads, colored pencils to paint brushes, or even glitters and sequins in separate jars. For those who dabble in multiple crafts, label each jar by its contents or project type.
This not only ensures that every little craft accessory has its designated spot, but it also transforms your craft area into a visually appealing workspace.
With jars as your craft supply allies, every creative endeavor becomes a seamless blend of inspiration and organized artistry.
Tools:
Anyone who’s ever tried to find a specific screw, nail, or drill bit knows the importance of organized tool storage.
Jars provide an ideal solution for this dilemma, allowing for clear visibility while keeping everything neatly in place.
Here’s how jars can be pivotal in tool organization:
Nuts, Bolts, and Screws: Separate and store different types and sizes of fasteners in separate jars. Label them or simply rely on the clear nature of the jars to quickly spot what you need.
Drill Bits: Keep various drill bits in jars, categorizing them by type or size. This not only makes them easy to find but also prevents the sharper bits from causing accidental injuries.
Brushes and Applicators: If you’re into painting or staining, jars can hold brushes and foam applicators, ensuring the bristles maintain their shape and the foam doesn’t get squished.
Small Hand Tools: Jars can also be used for small tools like Allen wrenches, precision screwdrivers, or wire strippers, making sure they’re always within easy reach.
Wall Mounted Jars: For those looking to save counter space, lids of jars can be screwed onto the underside of a shelf. The jars can then be twisted into place, hanging beneath the shelf, making for a neat and visually appealing storage solution.
Safety First: A jar dedicated to safety equipment – like earplugs, small goggles, or dust masks – ensures that protective gear is always at hand.
Implementing jars as storage in a workshop or garage doesn’t just lead to efficiency; it also promotes a safer work environment.
By having everything neatly stored away and easy to find, you can avoid the pitfalls and frustrations of a cluttered workspace.
Jars stand out as an inexpensive and effective organizational hack for hobbyists and professionals alike.
Bathroom Utilities
Soap Dispensers:
In a world where personal touches make a home truly yours, jars provide an unexpected and chic solution for your bathrooms and kitchens: soap dispensers.
With a simple soap dispenser pump for mason jars attachment, which can be easily found online or in craft stores, you can transform any regular jar into a stylish liquid soap or lotion dispenser.
This not only gives a rustic charm to your sinks but also allows for customization.
You can fill them with your favorite scented lotions or colorful liquid soaps, making them both functional and decorative.
Plus, buying soap in bulk and refilling your jar dispensers is often more cost-effective and environmentally friendly than continuously buying smaller, plastic bottles.
With jars, your cleansing experience is elevated to a blend of frugality, sustainability, and aesthetic appeal.
Cosmetic Organizers:
In the world of cosmetics, with myriad products from lipsticks to brushes, organization can be a daunting task.
Enter the versatile jar.
With their clear, see-through structure, jars become the perfect companion to sort, display, and easily access your beauty products.
Use smaller jars for items like lip balms, eyeliners, or single eyeshadows. Larger jars can hold brushes, mascara, and even liquid foundations or creams.
For those who love a touch of DIY, you can decorate your jars with ribbons, lace, or stickers to match the theme of your vanity or dressing table.
This not only adds a personal touch but also makes the process of getting ready each day a delightful experience.
Furthermore, by using jars, you can keep your products dust-free and in pristine condition.
Elevate your beauty routine with this frugal yet fashionable storage solution, ensuring every makeup session starts with style and ease.
Bath Salts & Bombs:
For many, a relaxing bath is the epitome of self-care and rejuvenation. Enhance this luxurious experience by storing your bath salts and bath bombs in repurposed jars.
Their airtight seal ensures that the aromatic fragrances and therapeutic properties of your bath products are preserved.
The transparent nature of jars also adds a touch of spa-like elegance to your bathroom decor, making every bath feel like a retreat.
You can layer different colored bath salts in a jar for a beautiful, gradient effect. Or, for those who love crafting their own bath products, jars become the perfect container for homemade salts, scrubs, and bath bombs.
Attach a handmade label or a ribbon, and you’ve got a ready-made, thoughtful gift for any occasion.
With jars, your bath essentials are not just stored; they’re showcased, elevating every soak to a sublime experience.
Gardening and Outdoor Uses
Seed Starters:
For gardening enthusiasts or those keen on starting their plant journey, jars offer a fantastic method to kickstart seed germination.
Their transparent nature allows you to closely monitor the progress of your seeds, witnessing the magical process of a sprout emerging and growing roots.
To use a jar as a seed starter, fill it with a good-quality potting mix, place the seeds at the appropriate depth, and lightly water.
Cover the jar with a piece of clear plastic or cling wrap to create a mini-greenhouse effect, ensuring warmth and humidity — essential for germination.
Once the seeds sprout and grow a bit, they can be transplanted to larger pots or directly into the garden.
Staring your seeds in jars not only offers a practical and frugal solution but also transforms the act into an educational and engaging experience, especially for kids.
It’s nature and sustainability wrapped in one clear container, fostering growth in more ways than one.
Lanterns:
Place tea lights or small flameless LED lights inside jars and hang them or place them around your garden or patio for a cozy ambiance. Or, place strings of mini LED lights inside jars to create ambient lighting.
This simple yet effective idea is perfect for parties, weddings, intimate dinners, and even as night lights.
The glow emanating from the jar provides a warm, fairy-tale ambiance that can elevate any event’s atmosphere.
Whether it’s a garden party under the stars, a beachfront wedding, or just a cozy evening on your balcony, these jar lights add a touch of magic.
Plant Containers:
As urban spaces become more constrained, bringing nature indoors has become both a design trend and a serene escape.
Jars offer an ideal solution to house your beloved green companions.
From succulents to ferns, the clear containers can turn into beautiful terrariums or simple plant pots, adding a touch of verdant elegance to any room.
When using jars as plant containers, ensure adequate drainage for the plants.
You can layer the bottom with small pebbles or activated charcoal before adding the potting mix. This helps in preventing water stagnation and root rot.
For plants that thrive in humid environments, like mosses, the jar can act as a mini-ecosystem, retaining moisture and creating a humid environment.
The transparency of the jars also means you can observe the intricate root systems, making it an aesthetic and educational experience.
Positioned on window sills, shelves, or desks, jar-contained plants become a symbol of life, growth, and eco-friendly décor, all while championing the principles of reuse and frugality.
On-the-Go Solutions
Travel Snacks:
Every seasoned traveler or on-the-go individual knows the importance of having a nutritious snack handy.
Jars offer a sturdy and spill-proof solution for storing and transporting a variety of snacks.
Whether it’s a mix of nuts and dried fruits, yogurt parfaits layered with granola, or even pre-made salads, jars can hold them all efficiently.
Their compact design makes it easy to fit into bags or backpacks without the worry of crushing your food.
Plus, the airtight seal ensures freshness and prevents any messy leaks.
For those who are health-conscious, pre-packing snacks in jars also means better portion control and the opportunity to avoid unhealthy, last-minute food purchases during trips.
Beyond just practicality, using jars for travel snacks aligns perfectly with the ethos of sustainability. It reduces dependency on single-use packaging and encourages mindful eating.
The next time you’re hitting the road or catching a flight, grab a jar of your favorite snack and travel both sustainably and deliciously.
Beverages:
The humble jar has found its way into cafes, restaurants, and homes as a trendy and practical vessel for beverages.
From iced coffees to smoothies, lemonades to craft beers, jars offer a touch of rustic charm while serving your favorite drinks.
One of the benefits of using jars as beverage containers is their wide mouth, making it easy to add in ingredients, stir, and sip.
They’re also incredibly durable, reducing the risk of easy breakage, especially when you’re enjoying an outdoor picnic or a backyard BBQ.
For those who love experimenting, jars can also be used for creating layered drinks or infusing waters with fresh fruits and herbs.
Seal them with a lid, and you’ve got a spill-proof drink ready for your travels or workouts. Plus, for parties, jars can be adorned with ribbons, tags, or even chalk markings to personalize each guest’s drink.
Choosing jars for your beverages not only stands as a testament to resourcefulness and frugality but also adds a fun and aesthetic twist to your hydration habits. Cheers to sustainable sipping!
Lunch Box:
Step up your lunch game by repurposing jars into innovative lunch boxes.
Whether it’s a layered salad, pasta, rice dishes, or even soups, jars can securely store a plethora of meal options, ensuring they remain fresh and appetizing.
The vertical structure of jars is particularly perfect for layering ingredients.
For instance, you can start with a dressing at the bottom, followed by harder vegetables or proteins, and top it off with leafy greens, ensuring that nothing gets soggy before it’s time to eat. When lunchtime arrives, simply shake, open, and enjoy!
The airtight seal of jars is excellent for preserving the freshness of your meals, especially if you’re prepping a few days in advance.
Plus, the glass nature ensures no unwanted flavors are imparted into your food, unlike some plastic containers.
Transporting these is a breeze, especially with their leak-proof design. They fit comfortably in most bags, and their sturdy nature means no squished sandwiches!
Using jars as lunch containers is not just a nod to frugality and sustainability, but it also elevates the lunchtime experience, making every meal feel a bit more gourmet.
Gifts and Decor
DIY Gift:
There’s an unparalleled joy in giving and receiving handmade gifts. They carry the essence of effort, thought, and personal touch. Jars serve as an ideal canvas for a plethora of DIY gift ideas that cater to diverse tastes and occasions.
Recipe in a Jar: Layer the dry ingredients of a cookie or brownie recipe in a jar. Attach a label with the recipe’s remaining steps and wet ingredients needed. It’s a delightful treat that allows the recipient to bake and enjoy fresh goodies.
Homemade Scrubs and Lotions: Combine natural ingredients to craft body scrubs, bath salts, or lotions. Infuse with essential oils for an added aromatic touch.
Scented Candles: Melt wax, add fragrance or essential oils, and pour into a jar with a wick in place. Once set, you have a homemade candle ready to light up someone’s day.
Memory Jar: Fill the jar with small notes, each jotting down a memory, quote, or reason you appreciate the recipient. It becomes a daily dose of love and positivity.
Customized Plant Pot: Plant a small succulent or flower in the jar, creating a living, breathing gift that grows with time.
Sewing Kit: For someone who loves to sew or might just need essentials for mending, a jar filled with threads, needles, and buttons makes for a practical and cute gift.
Decorate the jar with ribbons, tags, or paint to add a personal flair.
Gifting a DIY jar not only shows thoughtfulness but also champions the principles of recycling and sustainability, making the present doubly impactful.
Vases:
Flowers have a way of instantly brightening up a space, and when paired with the right container, their beauty is accentuated even further.
Jars offer a simple yet sophisticated solution to showcase your floral arrangements, whether they’re freshly picked from the garden or bought from a store.
The transparent nature of jars allows the entire beauty of the flower to be seen – from the vibrant petals right down to the often overlooked stems submerged in water.
This creates a holistic view of the floral arrangement, making it a focal point of any room.
Jars come in various sizes, and this versatility can be used to create diverse floral displays:
Single Stem Showcase: Use a smaller jar to highlight the elegance of a single rose, tulip, or daisy.
Wildflower Collection: Fill a larger jar with a mix of wildflowers for a burst of color and a touch of the countryside.
Floating Blossoms: For a unique display, fill the jar with water and let petals or small blossoms float on top.
To elevate the presentation further, you can tie a ribbon around the jar’s neck or even paint the jar for a more personalized touch.
Using jars as vases is not only a testament to innovative upcycling but also adds a touch of rustic charm, making every floral display a conversation starter.
Kitchen Uses
Leftover Grease Storage:
One of the little-known but highly practical uses of old jars is storing leftover cooking grease. Instead of pouring fats down the drain, which can lead to blockages and plumbing issues, pour them into a jar.
Once filled, you can either dispose of the jar responsibly or, if using animal fats, reuse the grease for cooking, giving your dishes added flavor.
Remember to strain out any particles from the grease to extend its shelf life and always ensure the jar is heat-resistant to prevent cracking when pouring hot grease.
Straw Storage:
Jars provide the perfect storage solution for straws, ensuring they remain clean and easily accessible. Placing them in a clear jar on your countertop or dining table helps keep them organized.
Drinking Glasses:
Save your empty jars for drinking glasses for the family! No need for purchasing drink glasses when you can save jars for this purpose.
Holiday Decorations and Centerpieces
Every festive table needs a centerpiece that ties the theme together and sets the tone for the celebration.
Jars, in all their adaptable glory, can be effortlessly transformed into stunning centerpieces that capture the essence of the holiday.
Here’s how to craft a memorable holiday centerpiece using jars:
Floating Candles: Fill a jar halfway with water, drop in some cranberries or holly berries, and float a tealight on top. The gentle flicker of the candlelight adds a warm and intimate touch to festive dinners.
Rustic Christmas: Layer pine cones, baubles, and sprigs of evergreen in a large jar. Intertwine with fairy lights for that magical Christmas glow.
Harvest Festival: Fill jars with layers of corn kernels, dried beans, and lentils, representing the bounty of the harvest. Place a pillar candle on top for Thanksgiving or autumn dinners.
Easter Spring Vase: Paint jars in pastel shades and fill them with fresh spring flowers like daffodils or tulips. Scatter a few painted eggs around the base for a complete Easter feel.
Halloween Potion Bottles: Color water with food dye to create eerie concoctions, and label the jars with names like “Witch’s Brew” or “Goblin Elixir”. Place these at the center, surrounded by pumpkins and spiders for a spooky touch.
Valentine’s Love Notes: Fill a jar with handwritten notes or printed love quotes rolled into tiny scrolls. Surround it with rose petals and tealights for a romantic Valentine’s dinner.
Summer Beach Vibes: Layer colored sand, seashells, and tiny starfish in a jar to evoke the feel of a beach vacation during summer gatherings.
Patriotic Display: Fill jars with fresh red and white flowers such as roses, carnations, or daisies. The natural beauty of the blooms contrasts wonderfully with the vibrant colors of the flag. Place mini flags in extra jars if desired.
Each centerpiece is not just an adornment but a conversation starter, echoing the creativity and thought that went into its creation.
By using jars as centerpieces, you champion the concepts of upcycling and sustainability while ensuring your holiday table is always beautifully decked out.
Money Saving: Use a Jar as a Piggy Bank
Storing Loose Change:
Over time, those pennies, nickels, and dimes can add up. Instead of letting them scatter around in drawers or the bottom of bags, use a jar as a dedicated spot for your loose change.
It’s surprising how quickly a jar can fill up, turning your spare coins into a nice little savings pot.
Additionally, seeing the jar gradually fill can act as a tangible motivation to keep saving.
Once full, you can either roll up the coins for deposit or treat yourself to something nice, truly embracing the idea of frugality and savings.
Wrapping up
For the budget-conscious and the environmentally friendly, jars are more than just containers—they’re opportunities.
Each jar saved from the landfill is a testament to a sustainable lifestyle and frugality.
It’s a small change, but with every reused jar, you’re not only saving money but also making a positive impact on the environment.
Embrace the jar revolution and watch the savings—both monetary and environmental—accumulate.
You may also like: 31 Uses for Coffee Cans, Baby Formula Cans, and Other Containers
Frequently Asked Questions: Reusing Jars for Savings
Q1: Is it safe to store food in reused jars?
Answer: Yes, it’s safe to store food in reused jars, provided they are thoroughly cleaned and sterilized. Ensure the jar is free from any old residue or odors and that the lid seals properly to maintain freshness.
Q2: How can I remove the label and its sticky residue from jars?
Answer: Soak the jar in warm soapy water for a few hours or overnight. Most labels will peel off easily after soaking. For stubborn residue, a mixture of baking soda and oil (like olive or vegetable oil) can be used as a gentle scrub. A good scrub with Dawn dish soap works, too!
Q3: Can I use jars for freezing liquids or food?
Answer: Glass jars can be used for freezing, but it’s essential to leave enough headspace (typically an inch or more) to allow for the expansion of liquids. Ensure the jar is not cracked or chipped, and always cool the contents before freezing.
Q4: Are all jars suitable for creating DIY candles?
Answer: Most glass jars can be used for DIY candles. However, it’s essential to ensure that the glass can handle the heat. Jars that once held food products, like pasta sauces or pickles, are typically safe choices.
Q5: How do I sterilize jars for food storage?
Answer: To sterilize jars, wash them in hot soapy water and rinse well. Then, place them in a pot of boiling water for 10 minutes. Remove them carefully using tongs and let them air dry on a clean cloth.
Q6: I’m concerned about the environmental impact of lids. What can I do?
Answer: Some jar lids can be recycled, depending on local recycling programs. Alternatively, you can buy reusable lids made from sustainable materials or even upcycle old lids with fabric or other materials for non-food storage uses.
Q7: Are there any foods or substances I shouldn’t store in glass jars?
Answer: Acidic foods can etch into some types of glass over time, but most commercial food jars are designed to handle these. It’s also wise to avoid storing chemicals or non-food substances unless the jar is explicitly labeled safe for that purpose.
Q8: Can I use reused jars for canning?
Answer: Reused jars can be used for canning if they’re free from cracks or chips and have an airtight seal when paired with a new lid. However, always check for a proper seal after processing to ensure food safety.
Q9: How long can I store dry goods in glass jars?
Answer: When stored in a cool, dry place, most dry goods like beans, rice, and pasta can last for 6 months to a year in a sealed glass jar. However, always check for signs of spoilage or pests before consumption.
Q10: Are there any creative ways to label repurposed jars?
Answer: Absolutely! You can use chalkboard paint to create erasable labels, attach tags with strings, or use adhesive label paper to print or handwrite labels. Washi tape also offers a colorful and easy-to-change labeling method.
By addressing these common queries, we hope to provide a comprehensive understanding of the benefits and methods of reusing jars, reinforcing their value in a frugal and sustainable lifestyle.